Walking into a Garfield - Escape from Monday boss fight without a stocked snack bar is the fastest way to watch a clean run collapse. Every heal matters once Garfield crosses the phase-two threshold, and the food you carried into the room decides whether you trade hits safely or eat a one-shot combo. This guide breaks down which dishes heal the most, when to commit them against Squeak, Nermal, Odie, and the final confrontation with Chef Monday, and how to pair your stack with each boss's punish window so the run survives into phase three.
Healing Food Stack and Boss Order Overview
Garfield - Escape from Monday hands out healing food from a handful of sources: vending machines in the overworld hub, breakable pots in boss arenas, snack drops off regular enemies, and recipe pickups tied to the lasagna-lovers side chain. None of these sources are infinite, which means the order in which you spend each item directly controls your margin for error across the full boss rush. Most players who reach the final boss with empty inventory had the right food at the wrong time earlier in the run.
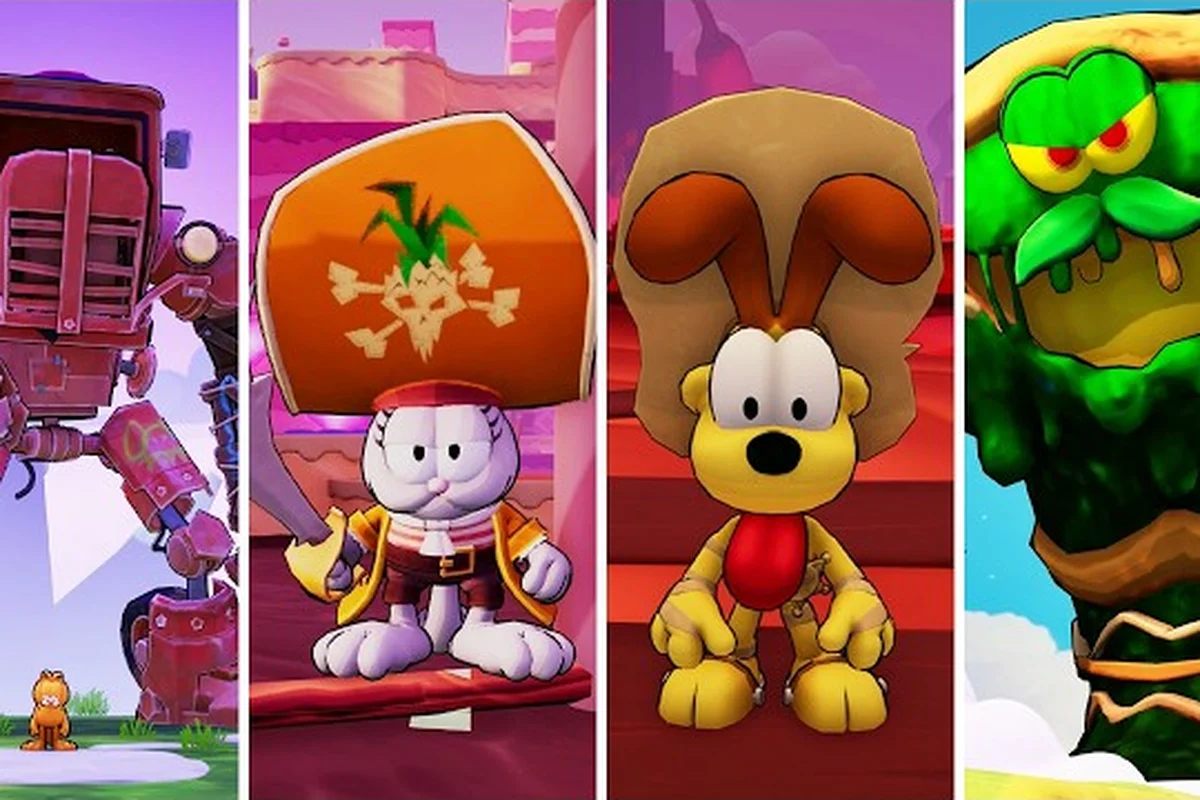
The four main bosses appear in this order: Squeak (Act 1, the mouse), Nermal (Act 2, the cuteness spammer), Odie (Act 3, the chase fight), and Chef Monday (the finale). Each one pressures a different resource, so the healing-food plan shifts slightly between rooms. The official store page describes the lineup as a "roguelike of Mondays" where Garfield survives by raiding the fridge, which lines up with how aggressively the game rewards food-stacking before a boss door.
| Boss | Position | Best Healing Food | Why This Food Wins |
|---|---|---|---|
| Squeak | First boss | Lasagna Slice | High flat heal, easy to carry from hub |
| Nermal | Second boss | Pizza Roll | Fast pickup, restores mid-projectile spam |
| Odie | Third boss | Chocolate Bar | Slow drain match, top-off after chase hits |
| Chef Monday | Last boss | Full Lasagna Pan | Only heal that survives phase-two burst |
Stacking the wrong tier of food against the wrong boss is a common early wipe. The four healing items below are the only ones that meaningfully affect boss-fight outcomes, because everything else in the snack pool is either a temporary buff or a coin pickup.
| Healing Item | Heal Amount | Source | Carry Limit |
|---|---|---|---|
| Lasagna Slice | 35 HP | Hub fridge, Squek arena pots | 4 |
| Pizza Roll | 22 HP | Vending machine, Nermal arena crates | 6 |
| Chocolate Bar | 18 HP | Shop kiosk, Odie chase pickups | 5 |
| Full Lasagna Pan | 60 HP | Chef Monday prep room only | 2 |
Players who clear the first three bosses on their first attempt typically enter the finale with at least one Full Lasagna Pan plus two Pizza Rolls, which is the minimum viable stack to outlast phase two. Running into any boss with zero food is a hard reset, since the overworld does not refill snacks between acts once you trigger the boss door.
Squeak Fight Food Routing and Punish Windows
Squeak is the first real test of the healing-food system because the arena is small and the mouse telegraphs only one real combo. Squeak's signature move is a two-part dash followed by a squeak-projectile that bounces off the back wall. The window between the second dash and the projectile is roughly half a second, and that is the moment to either heal or punish. Players who burn their food on the first phase arrive at phase two with nothing, and the second phase is exactly where Squeak's projectile count doubles.
A clean first phase should cost no more than one Lasagna Slice. The opening of the fight gives you a free heal window because Squeak circles the room before committing to the dash combo, so pop a Lasagna Slice right after the door closes. Hold your Pizza Rolls for the projectile spam in phase two, because each bounce removes a small but consistent chunk of HP and a missed heal there snowballs into a death at the very end of the fight.
Garfield - Escape from Monday squeak tips from community runs recommend committing exactly one Lasagna Slice at fight start, then switching to Pizza Rolls only when the second phase begins. Squeak's HP bar has two visible segments, and the heal pattern changes the moment the second bar appears. Phase one is single-target, phase two adds a second squeaker clone, and the two-mouse projectile rotation is what drains unprepared players dry.
| Phase | Squeak Behavior | Heal Recommendation | Risk if Missed |
|---|---|---|---|
| Phase 1 | Single dash combo, one projectile | 1x Lasagna Slice at fight start | Mid-phase chip damage |
| Transition | Clone spawns, brief pause | 1x Pizza Roll during the spawn flash | Heavy opening hit |
| Phase 2 | Two-mouse projectile rotation | 1-2x Pizza Roll between volleys | Full HP loss, no recovery |
A useful community-recorded reference for the Squeak timing is the Gellot no-damage run on YouTube, which captures the clean punish window between the dash and the projectile. The footage confirms the heal timing most players describe in their write-ups: open with the Lasagna Slice, save the smaller food for the phase-two projectile spam, and never commit your Full Lasagna Pan against the first boss under any circumstance.
The most common mistake at Squeak is panicking into a Lasagna Slice the moment HP drops to half. Squeak's combo is short and the chip damage between combos is low, so the heal can almost always wait until the next clear window. Burning two slices in the first phase is the single most common reason players arrive at the Nermal arena empty-handed.
Nermal Projectile Spam and Food Cycling
Nermal is the Garfield - Escape from Monday second boss and the one most often blamed for the first wall. The fight takes place in a kitchen arena filled with bouncing projectile toys, and Nermal cycles through a four-attack rotation: a heart projectile, a star projectile, a rolling yarn ball, and a self-damage cuteness-burst that heals Nermal if Garfield is close. The cuteness-burst is the attack that ends unprepared runs, because players who panic-heal into the wrong window stand still and absorb the heal-back volley. Players learning how to approach the Nermal pattern can see the spacing clearly in the YTSunny no-damage all-bosses video, which shows how much room the cuteness-burst actually needs.
Nermal projectiles are the defining pressure of the fight. There are up to six active projectiles on screen at once, and each one chips away at Garfield's HP in a way that looks small but adds up fast. Pizza Rolls are the right healing food for this room because they restore enough HP to absorb a projectile hit without wasting a Lasagna Slice that should be saved for Odie or Chef Monday. The community-recommended cycling pattern is one Pizza Roll every two projectile cycles, which keeps HP in the safe zone without emptying the stack before Nermal's second phase.
| Projectile Type | Damage | Heal Cost to Recover | When to Heal |
|---|---|---|---|
| Heart bounce | 8 HP | Skip — chip is small | Only if below 30% |
| Star pinwheel | 12 HP | 1x Pizza Roll every 2 hits | Mid-volley, between cycles |
| Yarn ball | 18 HP | 1x Lasagna Slice if stacked | Right after the roll lands |
| Cuteness-burst | Heals Nermal if close | Step back, do not heal | Never heal during burst |
The cuteness-burst is the only attack in the Nermal kit that does not need a heal response. Stepping back costs nothing, but standing still to eat a Lasagna Slice puts Garfield inside the heal radius, which means Nermal recovers the HP you just spent food to remove. The only correct response to the cuteness-burst is to dash away and wait for the next projectile cycle, which is the moment a Pizza Roll actually pays off.
Phase two of the Nermal fight adds a second toy box on the right side of the arena, doubling the projectile density. Players who entered the fight with four Pizza Rolls and one Lasagna Slice typically exit with two Pizza Rolls and the Lasagna Slice intact, which is the exact stack needed for the Odie chase. Players who burned food on the cuteness-burst usually arrive at Odie with one Pizza Roll, which is not enough to survive the chase hits and forces a reset back to the hub.
| Nermal Phase | Active Projectiles | Food Budget | Heal Timing |
|---|---|---|---|
| Phase 1 | 2-3 | 2x Pizza Roll, optional 1x Lasagna Slice | Between cycles, never during burst |
| Phase 2 | 4-6 | 1-2x Pizza Roll | Only when HP drops below 50% |
| Burst windows | 0 (dodge only) | None | Dash back, do not heal |
One practical rule from community testing: if HP is above 60% during the Nermal fight, hold the heal. The chip damage from heart bounces and star pinwheels is small enough to ride out, and saving the food for Odie's chase hits is the difference between a clean run and a reset. The full boss list and ordering is also covered in our Garfield - Escape from Monday boss list breakdown, which cross-references the same four-boss structure.
Odie Chase Fight and Weakness Windows
Odie is the Garfield - Escape from Monday third boss, and it is the only fight in the run that plays like a chase sequence rather than a room fight. Odie sprints across a long horizontal arena in three laps, and the chase hits deal high single-hit damage rather than chip damage. This is the fight where Chocolate Bar pickups inside the arena become critical, because the chase layout means you cannot pause to eat a Lasagna Slice mid-sprint. Odie is one of the trickier encounters in the final boss ordering walkthrough because the heal timing is forced by the chase itself.
Garfield - Escape from Monday odie weaknesses line up with the chase-hit pattern. Odie commits to a tackle at the end of each lap, and the recovery animation is the only safe heal window in the entire fight. Chocolate Bars drop from breakable crates along the chase path, and they are the only healing food that fits inside a half-second window without forcing Garfield to stop. The heal amount is small, but small heals are exactly what the chase pattern needs, because a single missed Chocolate Bar means absorbing two chase hits in a row.
| Chase Lap | Odie Behavior | Heal Window | Recommended Food |
|---|---|---|---|
| Lap 1 | Slow tackle | Right after tackle lands | 1x Chocolate Bar |
| Lap 2 | Speed-up tackle | Mid-recovery animation | 1x Chocolate Bar or Pizza Roll |
| Lap 3 | Full-speed tackle | Post-tackle pause only | 1x Lasagna Slice if available |
Phase two of the Odie fight begins after lap three and converts the chase into a circular arena with the same tackle pattern but more frequent. The phase-two chase hits remove roughly a third of HP each time, which is why a Lasagna Slice committed at the start of phase two is the single most valuable heal in the entire Odie fight. Players who run into Odie with no Lasagna Slice usually take two chase hits in phase two and die before the final cutscene.
A common player mistake is to commit a Pizza Roll during lap one. The lap-one tackle is slow, and a Chocolate Bar covers the chip damage without wasting the higher-tier food. Saving the Pizza Rolls for lap two and the Lasagna Slice for the phase-two transition is the optimal cycling pattern, and the aWiibo all-bosses run on YouTube shows the exact heal timing in clean footage.
| Odie Phase | Heal Budget | Worst Mistake |
|---|---|---|
| Chase laps | 2x Chocolate Bar, 1x Pizza Roll | Using Lasagna Slice during lap 1 |
| Phase 2 circle | 1x Lasagna Slice (mandatory) | Entering phase 2 with no slice left |
| Final stretch | 1x Chocolate Bar if any survive | Skipping the post-tackle heal |
The cleanest community rule for Odie is to never enter the fight with fewer than three Chocolate Bars. The chase path guarantees at least two breakable crates, so a stack of three plus a Pizza Roll plus a Lasagna Slice covers the entire run. Anything less, and the chase hits outpace the heal output before Garfield reaches the arena exit.
Chef Monday Finale and Food Stack Optimization
Chef Monday is the Garfield - Escape from Monday last boss, and the fight is designed around the Full Lasagna Pan pickup in the prep room before the boss door. Chef Monday cycles through a five-attack rotation: ladle swing, pot-lid shield, sauce projectile, skillet slam, and a phase-two special called the Monday Roast that hits the entire arena for massive damage. The Monday Roast is the only attack in the run that demands a Full Lasagna Pan, because the hit removes roughly 70% of Garfield's HP regardless of how the previous phases went.
Garfield - Escape from Monday chef monday attacks are telegraphed by the chef's hat animation, and each attack has a 1.5-second punish window that the heal-food plan needs to respect. The Full Lasagna Pan is the only food that survives a Monday Roast hit, which is why it is a hard-locked pickup in the prep room. Skipping the prep room pickup is the single most common reason players lose the finale, because the ladle-swing-to-Monday-Roast combo otherwise strips Garfield of all remaining HP before the phase-two heal window opens.
| Chef Monday Attack | Damage | Heal Required | Window to Heal |
|---|---|---|---|
| Ladle swing | 20 HP | 1x Pizza Roll | After second swing |
| Pot-lid shield | 10 HP reflect | None — dodge only | Never heal into shield |
| Sauce projectile | 14 HP | 1x Chocolate Bar | After projectile lands |
| Skillet slam | 35 HP | 1x Lasagna Slice | Recovery animation |
| Monday Roast | 70 HP | 1x Full Lasagna Pan | After the burst lands |
The Full Lasagna Pan in the prep room is the most important pickup of the entire run, and skipping it is a hard reset. Most community guides list the pan as a guaranteed spawn, and the Ben-Gun all-bosses compilation on YouTube shows the prep-room pickup clearly before the boss door. Players who reach Chef Monday with one Full Lasagna Pan plus two Pizza Rolls plus a Lasagna Slice have the minimum viable stack to clear both phases.
| Phase | Required Food Stack | Risk if Stack Is Short |
|---|---|---|
| Phase 1 (Chef Monday) | 1x Pizza Roll, 1x Lasagna Slice | One-shot by ladle-skillet combo |
| Phase 2 transition | 1x Full Lasagna Pan (mandatory) | Death by Monday Roast, no recovery |
| Phase 2 (Chef Monday+) | 1x Pizza Roll, 1x Chocolate Bar if any left | Chip damage compounds |
The optimal heal cycling for Chef Monday is to commit the Pizza Roll after the first ladle swing, hold the Lasagna Slice for the skillet slam recovery, and use the Full Lasagna Pan only on the Monday Roast. Saving the pan for anything else means dying to the phase-two burst, because no other food in the game restores enough HP to survive a direct Monday Roast hit. Players who reach the finale with a second Full Lasagna Pan have a comfortable clear, and a third is the buffer that lets them make one or two mistakes in phase two without resetting.
| Heal Food | Priority vs Chef Monday | Reason |
|---|---|---|
| Full Lasagna Pan | Highest | Only heal that survives Monday Roast |
| Lasagna Slice | High | Required for skillet slam recovery |
| Pizza Roll | Medium | Covers ladle-swing chip damage |
| Chocolate Bar | Low | Only useful if other food is spent |
Players who want a more detailed pre-fight checklist can reference our Garfield - Escape from Monday pro tips guide, which covers food-stacking rules alongside the broader run strategy. The general rule holds across every boss: stack higher-tier food for the back half of the run, and never spend a Full Lasagna Pan before the finale.
Frequently Asked Questions
What is the best healing food to carry into the first boss in Garfield - Escape from Monday?
The best stack for the first boss is one Lasagna Slice and two Pizza Rolls, because the Squeak fight rewards a single high-value heal at the start of phase one and several smaller heals during the phase-two projectile spam. Carrying more than one Lasagna Slice into Squeak is wasted, since the later bosses need the higher-tier food much more than the first encounter does.
When should I use a Full Lasagna Pan in Garfield - Escape from Monday?
A Full Lasagna Pan should only be committed to the phase-two Monday Roast attack from Chef Monday, because the burst removes roughly 70% of HP and no other healing food in the game restores enough to survive it. Using the pan on any earlier boss leaves you unable to outlast the finale, and skipping the prep-room pickup before Chef Monday is a guaranteed reset.
Which Garfield - Escape from Monday boss is the hardest on healing food?
Nermal is the hardest boss on healing food because the four-attack rotation produces constant chip damage from up to six active projectiles, and the cuteness-burst attack punishes players who heal at the wrong moment. The optimal cycling pattern is one Pizza Roll every two projectile cycles, with no heal during the cuteness-burst windows.
How many Chocolate Bars do I need for the Odie chase fight?
The minimum viable stack for the Odie chase fight is three Chocolate Bars plus a Pizza Roll plus a Lasagna Slice, because the chase hits deal high single-target damage and the only safe heal window is the post-tackle recovery animation. Entering the chase with fewer than two Chocolate Bars usually results in a phase-two death.
Can I respawn healing food between boss fights in Garfield - Escape from Monday?
No, healing food does not respawn between boss fights once you trigger a boss door, which is why the order in which you spend each item directly controls your margin for error across the full run. The overworld hub does refill vending machines, but only if you exit the boss arena through the retry door rather than the continue door.