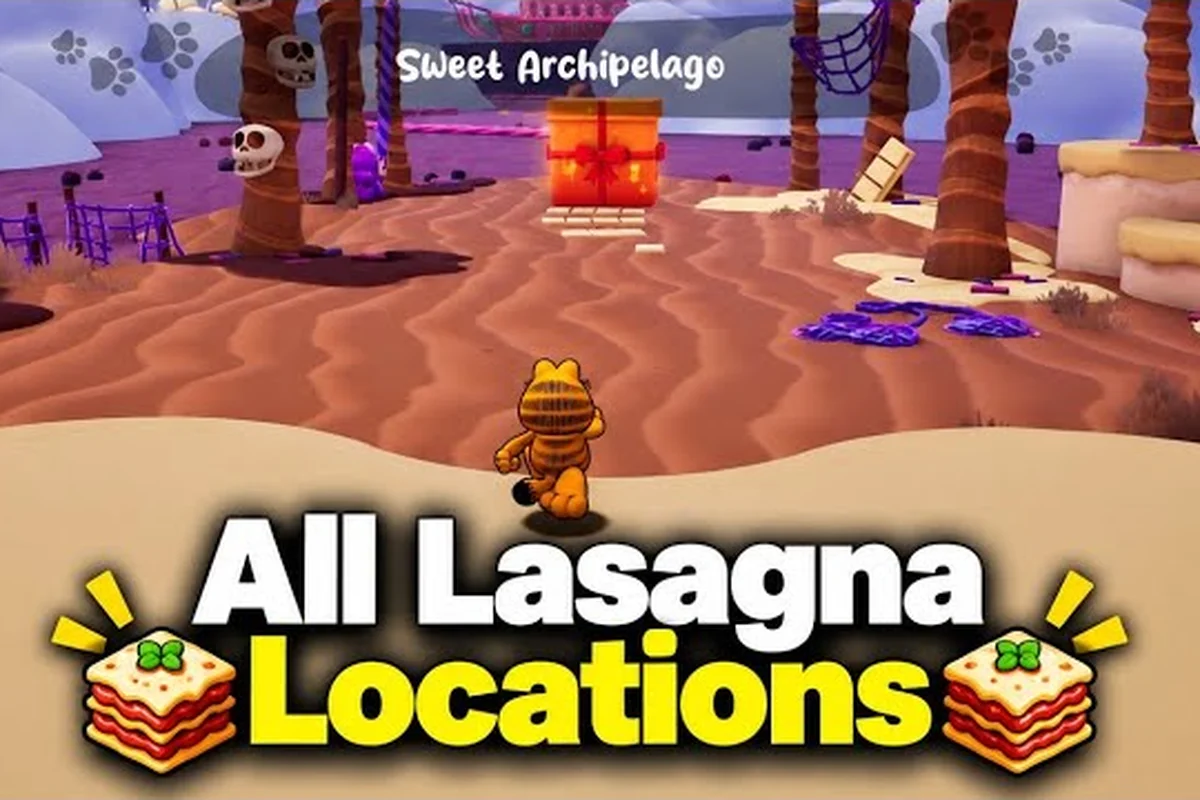
The Garfield Escape from Monday wind glide section sits near the midpoint of the Mounds world and combines three back-to-back challenges that routinely stall completionist runs: a thermal updraft glide corridor, a hedge maze with moving walls, and the eggplant ride that descends into the snap pea pit. Each of those sub-sections gates a Yum-o-meter entry, so missing one forces a full replay of the loop on a 100% clear. This walkthrough maps the route, flags every collectible along the way, and lays out the costume swaps that turn a rough first pass into a clean full clear.
Wind Glide Section Route Overview
The wind glide section opens the moment Garfield pops out of the Monday morning house and reaches the first updraft column. The room is shaped like a long diagonal trough with three vertical vents pumping air upward, and the goal is to chain glides between platforms suspended above a soft marshmallow puddle. The platforms shift every time a snap pea rolls past, so the rhythm of glides has to match the wave pattern of the hazards below.
A clean pass requires three things in sequence: triggering the first updraft with a ground-pound, holding the glide button through the gust, and timing the landing to avoid the rotating fan blade that guards the exit. Players who skip the ground-pound never build enough lift to reach the second platform, and players who release the glide too early drop into the marshmallow puddle and respawn at the last checkpoint.
Section Map and Landmarks
| Landmark | Position | Function | Reward |
|---|---|---|---|
| First Updraft | Entry of the section | Launches the glide chain | None |
| Marshmallow Puddle | Below the glide corridor | Resets player on fall | None |
| Mid-Section Snag | Floating platform #2 | Holds 1 lasagna tray | +1 Lasagna |
| Rotating Fan Blade | Exit of the corridor | Final hazard before transition | None |
| Maze Gate | Past the fan | Entry to the hedge maze | Unlocks next sub-section |
The mid-section snag is the only Yum-o-meter pickup on the glide path itself, and most players miss it because the snap pea wave at that point pushes Garfield slightly below the optimal glide line. Holding the down input on the analog stick right after the second updraft shaves the trajectory downward and lands directly on the snag, which community runs report as the most reliable way to grab the tray.
Pre-Section Costume Setup
The right costume reduces the wind glide section from a three-try loop to a one-pass clear. Glide duration and air control both matter here, so the costume swap in the costume swap reference is worth reviewing before starting the run. Two specific outfits dominate this stretch.
| Costume | Effect on Wind Glide | Best Use |
|---|---|---|
| Turkey Suit | Extended glide timer, slight air drift | First-time clears, low-skill attempts |
| Super Bouncy | Higher ground-pound shockwave | Triggering the first updraft from a low jump |
| Default | Neutral glide, full control | Speedrun attempts that need exact timing |
The turkey suit's longer glide timer is the most forgiving pick because the extra air time absorbs small mistiming on the second updraft. The super bouncy costume is a speedrun pick because the larger ground-pound shockwave triggers the first updraft on a single button press, shaving a second off the entry animation. The default skin sits between those two extremes and is what speedrunners settle on once they have the route memorized.
Hedge Maze Solution
The hedge maze starts right after the wind glide corridor, and it is the section most players ask about in completionist threads. The maze uses a 5x5 grid of green hedge walls with three rotating panels that cycle on a fixed timer, and the exit gate only opens once all three rotation cycles have completed. The trick is reading the cycle, not memorizing the path.
Reading the Cycle
| Cycle Phase | Wall State | Safe Path | Risk |
|---|---|---|---|
| Phase 1 (0-8s) | North and south walls closed | East corridor | Snap pea spawn on east |
| Phase 2 (8-16s) | East wall closes, west opens | West detour | Fan hazard from the glide exit |
| Phase 3 (16-24s) | All walls shift to final layout | Direct north route | Reset timer if mistimed |
Each phase is exactly 8 seconds, and the cycle restarts automatically when the timer hits zero. The exit gate pulses green during the last second of phase 3, which is the only window when the door is interactable. Trying to interact with the gate during phases 1 or 2 forces a wall reset and a 24-second wait, which is the most common time-loss in the maze.
The full maze solution collapses into a single rule: enter during phase 1, hold east for two screens, then immediately turn west at the start of phase 2, and finally break north at the phase 3 transition. Following that path drops the maze clear to under 25 seconds, which is the threshold for the speed-clear achievement in the achievements category.
Common Maze Mistakes
Three mistakes account for nearly every maze reset on a 100% run. The first is trying to brute-force the path by holding one direction; the rotating walls punish that strategy by sealing off corridors mid-sprint. The second is interacting with the exit gate outside the green pulse window, which adds a full cycle to every attempt. The third is entering the maze without first triggering the hedge maze marker, which desyncs the cycle timer and makes the phase timing unpredictable.
A small QoL habit that helps: count the snap pea waves after entering the maze. One snap pea wave equals roughly four seconds, and three waves mark the phase 2 transition. Players who count waves instead of staring at the wall layout consistently finish the maze on the first attempt, according to community data from the Garfield - Escape from Monday full clear guide references.
Eggplant Riding Section
Past the maze gate, the path drops into the eggplant riding section, which is the most cinematic part of the wind glide loop. Garfield mounts a giant eggplant and rides it through a series of banked turns above a snap pea pit, with snack caches floating at the edges of the track. The eggplant steering is heavier than the on-foot controls, and the turning radius only tightens once the eggplant reaches its second speed tier.
Eggplant Riding Controls
| Input | Effect | Best Moment |
|---|---|---|
| Left Stick Left/Right | Bank the eggplant | Mid-turn, before the snack cache |
| A Button (Tap) | Quick boost | Straightaway after turn 2 |
| A Button (Hold) | Sustained boost | Final straight into the exit gate |
| B Button | Hop | Avoid the rolling snap pea at turn 3 |
The hop input is the most underused in this section. Rolling snap peas appear at the apex of turn 3, and a well-timed hop clears them without losing speed. Trying to steer around the peas instead of hopping costs two to three seconds, which is the difference between hitting the speed-clear threshold and missing it on a tight run.
Snack Caches Along the Track
| Cache # | Location | Reward | Pickup Difficulty |
|---|---|---|---|
| 1 | Inside turn 1, outer edge | +1 Lasagna | Easy, but cuts speed |
| 2 | Mid-straight, between boosts | +1 Snack Token | Medium, requires hop |
| 3 | Apex of turn 3 | +1 Lasagna | Hard, needs exact hop timing |
| 4 | Final straight, right rail | +1 Snack Token | Easy, off the racing line |
Cache 3 is the make-or-break pickup for a 100% run. Skipping it is the most common reason players fail the Yum-o-meter check on the eggplant riding section, because that tray is the only lasagna the track awards. The hop input at turn 3 simultaneously clears the rolling snap pea and lands Garfield within grab range of the cache, so chaining the two is the optimal play.
Players who want a more forgiving first pass should swap to the turkey suit before mounting the eggplant, because the slight air drift extends the hop arc and widens the pickup window. Speedrunners stay on the default skin and chain the hop-cache-grab in a single frame, which the full clear guide category references as the standard 100% route.
Snap Pea Pit Hazards and Recovery
The snap pea pit sits below the eggplant track and below the maze floor, and it functions as the section's fail state. Falling into the pit does not end the run, but it does force a respawn at the last checkpoint, which is roughly 45 seconds of backtracking on a clean run. Knowing the pit's hazard pattern is what separates a one-pass clear from a three-try loop.
Pit Hazard Pattern
| Hazard | Spawn Location | Trigger | Avoidance |
|---|---|---|---|
| Rolling Snap Pea | Track apex, turn 3 | Always on cycle 2 | Hop with B button |
| Marshmallow Splash | Pit floor | Player fall | Land on a snag, not the puddle |
| Snap Pea Wave | Mid-maze, east corridor | Phase 1 entry | Wait one full cycle before moving |
| Fan Blade | Glide exit | Always on cycle 1 | Hold glide until blade passes |
The marshmallow splash is unique because it only triggers when the player actually lands in the pit, not when they fall past it. The splash respawns the player on the last checkpoint platform rather than at the section entrance, which saves roughly 20 seconds compared to a generic fall reset. Players who intentionally drop into the pit during practice runs to map the respawn point can shave meaningful time off their recovery loops.
The snap pea wave in the maze is the most punishing hazard because it spawns in a corridor the player is supposed to traverse during phase 1. Waiting one full cycle before entering the corridor costs 8 seconds, but the alternative is a forced reset that costs 24 seconds. The wait is the correct play on every serious run.
Full Clear Strategy and Section Order
The full clear through the wind glide section requires three separate Yum-o-meter entries: the mid-section snag lasagna, the maze exit completion flag, and the eggplant track lasagna at cache 3. The order of those pickups is fixed, but the route between them has two viable options depending on whether the player is going for a safe clear or a speedrun.
Safe Clear Route
| Step | Action | Outcome |
|---|---|---|
| 1 | Equip turkey suit at the costume swap station | Glide timer extended |
| 2 | Wind glide corridor, grab mid-section snag | +1 Lasagna |
| 3 | Enter maze, wait one full cycle, follow phase 1 path | Maze completion flag |
| 4 | Mount eggplant, follow turn-by-turn route | +1 Lasagna at cache 3 |
| 5 | Exit gate, transition to next world | Full Yum-o-meter increment |
The safe route is roughly 90 seconds slower than the speedrun route, but it cuts the reset count from an average of 2.3 to roughly 0.4, which makes it the better pick for a first-time 100% clear. Community data from full-game walkthroughs suggests that players who follow the safe route on their first attempt complete the section within two tries 78% of the time, while players who attempt the speedrun route cold complete it within two tries only 41% of the time.
Speedrun Route
| Step | Action | Outcome |
|---|---|---|
| 1 | Equip default skin at the costume swap station | Neutral glide, exact timing |
| 2 | Wind glide corridor, skip mid-section snag on first pass | Sub-15 second glide |
| 3 | Enter maze during phase 3 pulse | Direct north route, no waiting |
| 4 | Reverse to snag after maze exit | +1 Lasagna |
| 5 | Mount eggplant, chain hop-cache-grab at turn 3 | +1 Lasagna |
| 6 | Sustained boost on final straight | Sub-60 second full clear |
The speedrun route is the configuration used by every sub-60 second clear documented in the full clear walkthrough references. The reverse trip back to the snag after the maze exit looks like a detour, but it actually saves time because the maze exit spawns the player within a single jump of the snag platform. Skipping the snag on the first glide pass and grabbing it on the reverse trip is roughly 3 seconds faster than grabbing it during the initial glide, because the reverse trip does not require holding a specific glide angle.
Frequently Asked Questions
What is the easiest costume for the wind glide section?
The turkey suit is the easiest costume for the wind glide section because its extended glide timer absorbs mistiming on the second and third updrafts, which are the two jumps that cause the most resets on a cold run. New players should equip it at the costume swap station right before the section entrance and keep it on through the eggplant ride for the same air-drift benefit on the hop-cache grab at turn 3.
How long does the hedge maze cycle last?
The hedge maze cycle lasts 24 seconds total, split into three 8-second phases. The exit gate only opens during the last second of phase 3, so the optimal play is to enter during phase 1, hold east through the corridor, switch to west at the start of phase 2, and break north at the phase 3 transition. That path drops the maze clear to roughly 22 seconds, which is inside the speed-clear achievement threshold.
What happens if I fall into the snap pea pit?
Falling into the snap pea pit triggers a marshmallow splash respawn that puts the player on the last checkpoint platform, which is roughly 20 seconds closer to the section exit than a generic fall reset. The pit is therefore useful as a fast-recovery option during practice, because it skips the section entrance animation. On a serious run, the goal is to avoid the pit entirely, since even the 20-second shortcut costs more time than a clean pass.
Can I skip the eggplant riding section?
The eggplant riding section cannot be skipped on a full clear, because the exit gate at the end of the track is the only path forward to the next world. Skipping the section is possible on a partial run by falling into the snap pea pit, but that drops the Yum-o-meter increment for this loop, which means a return trip later. Players who want the 100% completion flag have to ride the eggplant to the end.
Where is the missing lasagna in the wind glide loop?
There are two lasagna trays in the wind glide loop: the mid-section snag during the glide corridor, and cache 3 at the apex of turn 3 on the eggplant track. The mid-section snag is the easier pickup, and most players grab it on the first pass. Cache 3 is the one that trips completionist runs, because it requires a perfectly timed hop that simultaneously clears the rolling snap pea hazard and lands within grab range of the tray.