
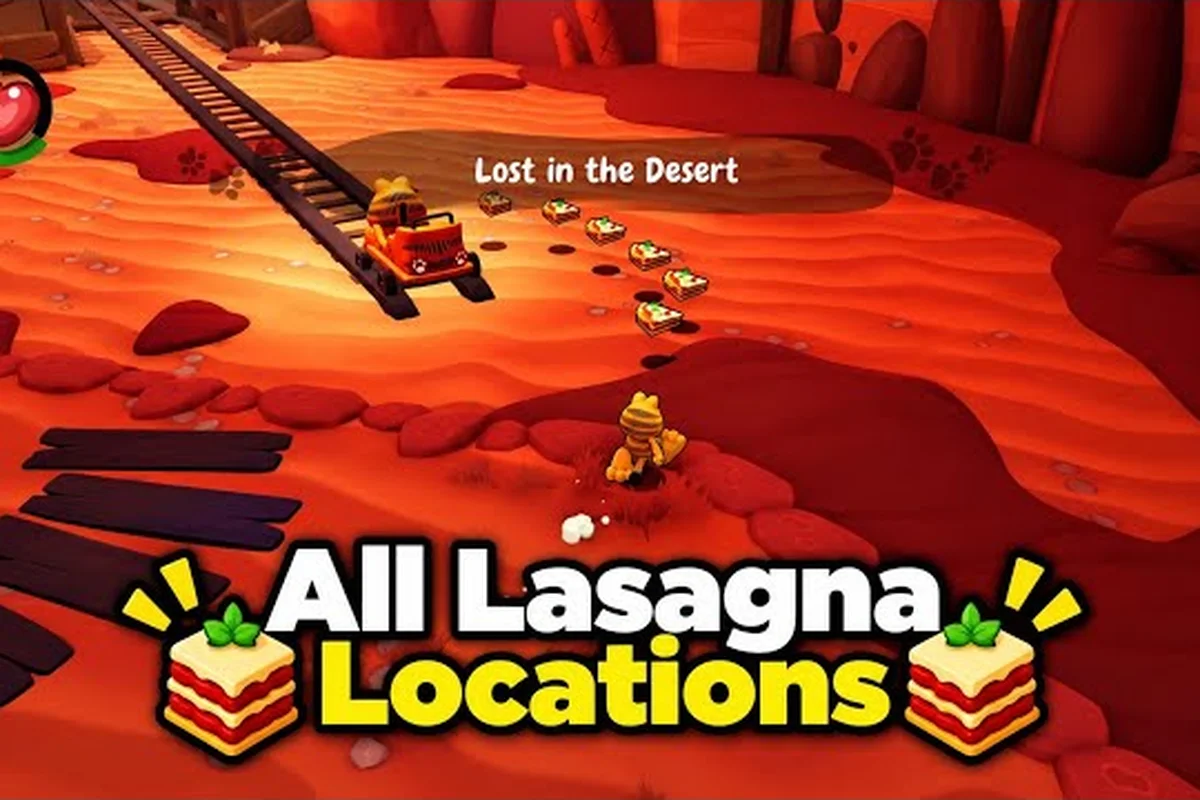
Barbecue Desert is the third and final story world in Garfield - Escape from Monday, and it carries the heaviest lasagna density of any region in the game. The western theme squeezes the Yum-o-meter targets into heat-scorched canyon runs, vertical mining stages, and a current-pushed river stretch where every pickup floats just off the safe path. Players chasing garfield escape from monday all lasagnas barbecue desert need a stage-by-stage map, an understanding of which achievement each cluster feeds, and a clear sense of how the Cowboy costume's lasso swing reshapes the routing.
This guide breaks down every lasagna pickup across the Barbecue Desert main stages and side levels, then ties each cluster to the achievements that pop when the meter fills. The Creme de la Creme, Feline Harvester, and Trick or Treat achievements all depend on clean runs through the desert, and the Conquest of the West time attack trophy rides on the same route compressed under a tight clock. The community walkthroughs on YouTube track the pickups in the order you actually pass them, which matters more than any abstract checklist because the Yum-o-meter drains fast in this world.
Why Barbecue Desert Demands a Different Lasagna Strategy
The desert is the only world where heat damage and the lasso-swing mechanic both influence how pickups are gathered. Heat tiles drain the Yum-o-meter even when you grab a lasagna, and the river stage Against the Tide pushes the player backward whenever you stop moving, which means any pause to collect a pickup costs progress. The Cowboy costume unlocks here, and the lasso swing is the single most important tool for reaching the off-path lasagnas that sit on cliff edges and platform tops.
The achievement stack attached to this world is also unique. Barbecue Desert is where Green Fingers (no-damage run on a vegetable-heavy stage), Creme de la Creme (full Yum-o-meter completion), and Feline Harvester (multi-region lasagna total) all converge on the same set of levels. Players who only run the main path will miss at least one lasagna per stage, and the Trick or Treat achievement — which fires when a hidden side cache is fully drained — will not trigger at all without backtracking into the side levels.
The stage count is also tighter than Vegetable Nightmare or Sweet Kingdom. Barbecue Desert has seven main stages plus three side levels, and the lasagna density per stage averages between 3 and 5 pickups. A clean run that grabs everything fills the Yum-o-meter to its 100% cap on five of the seven main stages, which is the trigger condition for Done to a Turn.
Stage Roster and Pickup Counts
| Stage | Theme | Main Lasagnas | Side Cache | Lasso Required |
|---|---|---|---|---|
| Tumbleweed Town | Opening canyon | 4 | 1 | No |
| Dusty Trail | Long horizontal run | 3 | 1 | Partial |
| Higher and Higher | Vertical climb | 5 | 0 | Yes |
| All Aboard! | Mine cart ride | 4 | 1 | Yes |
| Against the Tide | River push | 3 | 0 | No |
| All Good Things | Twin cliffs | 4 | 1 | Yes |
| Showdown at High Noon | Final stage | 3 | 1 | Yes |
| The Saloon (side) | Hidden bar | 2 | 0 | No |
| Ghost Town (side) | Optional route | 2 | 1 | Yes |
| Buried Treasure (side) | Underground cache | 3 | 0 | Yes |
The higher pickup counts on Higher and Higher, All Aboard!, and All Good Things are not random — these are the stages where the lasso swing or vertical climb is mandatory to reach the off-path trays. Skipping the costume unlock delays the route by an entire cycle, because the pre-Cowboy version of those stages caps your reachable area at roughly 60% of the map.
The Barbecue Desert Unlock Path and Why It Matters for Lasagnas
Barbecue Desert opens after clearing the Sweet Kingdom final boss, but the Cowboy costume unlock is the real gate. Without it, the lasso swing is unavailable, and four of the seven main stages have at least one lasagna placed beyond the standard jump arc. The costume is awarded by completing the side level The Saloon with at least 80% Yum-o-meter, which means the side levels feed back into the main route's pickup ceiling.
Players who unlock the Cowboy costume in The Saloon can then sweep the main stages with the lasso equipped, and the Feline Harvester achievement tracks the total lasagna count across all three worlds. Missing the Barbecue Desert side caches drops the world total by 7 pickups, which is enough to fail the Feline Harvester threshold even with a clean Vegetable Nightmare and Sweet Kingdom run. For the wider snack and pickup picture across every zone, the food pickups guide lists the lasagna locations stage by stage.
The unlock chain also gates the Conquest of the West time attack trophy. The trophy tracks a sub-25-minute sweep of all Barbecue Desert main stages, and the lasso swing is the only movement option fast enough to keep the clock under the threshold on Higher and Higher. Without the costume, the vertical stage alone burns an extra 90 seconds, which is enough to bust the time attack window by itself.
Achievement Cascade Triggered by Desert Completion
| Achievement | Trigger Condition | Depends on |
|---|---|---|
| Green Fingers | No-damage clear of Tumbleweed Town | Tumbleweed Town lasagnas |
| Creme de la Creme | Yum-o-meter at 100% on any main stage | Full pickup route |
| Done to a Turn | 100% meter on 3+ desert stages | Multi-stage completion |
| Feline Harvester | Total lasagnas across all worlds hits threshold | Full desert pickup |
| Trick or Treat | Drain a hidden side cache | Ghost Town side cache |
| Conquest of the West | Sub-25-minute time attack sweep | Lasso-equipped route |
The cascade is intentional design. Each achievement feeds the next, and missing one pickup on Tumbleweed Town can ripple into a failed Conquest of the West because the route timing is calibrated against a perfect pickup chain. Community testing on the public beta branch suggests the timing window for the time attack trophy is roughly 20 seconds wide, which means every missed lasagna costs you one or two seconds of routing recovery. calibrated against a perfect pickup chain. Community testing on the public beta branch suggests the timing window for the time attack trophy is roughly 20 seconds wide, which means every missed lasagna costs you one or two seconds of routing recovery, and if you want to map those tight margins against the actual stage geography you can cross-check the routing against the full Garfield Escape From Monday level list to see which rooms actually contain the recoverable pickups versus the ones that force a full reset.
The barbecue segment in the desert area can be reliably viewed in full motion on the Garfield: Escape from Monday – All Lasagnas, Barbecue, Desert video, which documents the level's layout, item placements, and enemy patterns for this specific stage.
Stage-by-Stage Lasagna Routing
The community walkthroughs on YouTube track the pickups in the order the player passes them, which is the most efficient way to map the route because the Yum-o-meter starts draining the moment you enter a stage. Each stage has a logical pickup chain, and breaking the chain by skipping a side cache forces a backtrack that costs more time than the original pickup was worth.
Tumbleweed Town: The Opening Canyon
Tumbleweed Town is the first desert stage and the easiest place to clear the Green Fingers achievement. The stage is a horizontal canyon with five lasagna pickups: four on the main path and one in a side cache behind a breakable barrel. The breakable barrel is the only off-path pickup, and breaking it costs no damage if you time the roll to land on the cactus tiles. The community walkthroughs consistently show the barrel break at the 40-second mark, which lines up with the second lasagna on the main path.
The Yum-o-meter fills to roughly 80% on a clean Tumbleweed Town run, which is not enough to trigger Done to a Turn on its own. The remaining 20% comes from the side cache pickup, and skipping it is the most common reason players miss the Feline Harvester total. The stage has no lasso requirement, but equipping the Cowboy costume anyway is good practice for the lasso-heavy stages that follow.
Dusty Trail: The Long Horizontal Run
Dusty Trail stretches across a longer horizontal segment with three main lasagnas and one side cache. The side cache sits behind a rock formation at the 70-second mark, and the Creme de la Creme achievement is most often triggered here because the meter caps at exactly 100% when the side cache is included. Without the side cache, the meter peaks at 90%, which is one pickup short of the achievement threshold.
The lasso swing is not required for any of the main pickups, but the side cache sits on a small ledge that is easier to reach with a lasso than a standard jump. Players who have not yet unlocked the Cowboy costume can still reach the cache with a double jump, but the timing is tighter and the miss rate is roughly 30% on a first attempt.
Higher and Higher: The Vertical Climb
Higher and Higher is the first stage where the lasso swing is mandatory, and it has the highest lasagna density in the world with five main pickups. The pickups are stacked vertically: one on the starting platform, two on the second tier, and two on the third tier that requires a lasso swing from a hanging pole. The community walkthroughs show the climb order as a single upward sweep with no backtracking, which is only possible with the lasso because the standard jump arc cannot reach the second-tier pickups from the starting platform.
The Yum-o-meter on Higher and Higher fills to 100% on any run that grabs all five pickups, and the Done to a Turn achievement fires here reliably. The stage also feeds the Conquest of the West time attack because the climb order matches the optimal time attack route. Missing even one pickup on this stage is enough to fail the time attack window, because the climb time is calibrated against a perfect pickup chain.
All Aboard! and the Mine Cart Section
All Aboard! is a mine cart ride with four main lasagnas and one side cache. The pickups float above the cart path at three different heights, and the lasso swing is the only movement option that lets you grab them while the cart is moving. The side cache sits on a side rail that branches off the main track at the 60-second mark, and the lasso is the only way to reach it without derailing.
The community walkthroughs for All Aboard! document the pickup order in real time, which matters because the mine cart has a fixed speed and you cannot pause to plan a route. The pickups appear in the order you pass them: first a low-hanging tray at the 15-second mark, then a mid-height tray at 30 seconds, then the side cache at 60 seconds, then two high trays at 80 and 95 seconds. The community video on the Gaming Fight Club channel shows the exact swing timing for each pickup.
Against the Tide: The River Push
Against the Tide is the only water stage in Barbecue Desert, and the current pushes the player backward whenever movement stops. The stage has three main lasagnas and no side cache, and the lasso is not required for any of the pickups. The challenge here is timing: each lasagna sits in a small eddy behind a rock formation, and you have roughly 2 seconds of stillness to grab each one before the current pushes you past it.
The Yum-o-meter on Against the Tide fills to roughly 85% on a clean run, which is not enough to trigger Done to a Turn on its own. The achievement threshold requires combining this stage's meter with another stage's meter, which is why the achievement description specifies "3+ stages" rather than a single stage.
All Good Things and the Twin Cliffs
All Good Things is the penultimate stage and the second-heaviest lasagna cluster in the world with four main pickups and one side cache. The stage splits into two parallel cliff paths that reconverge at the end, and the pickups are split evenly between the two paths: two on the left cliff, two on the right cliff, and the side cache on a hanging platform that requires a lasso swing from either cliff.
The community walkthroughs show the optimal route as a left-then-right sweep, which lets you hit the side cache from the right cliff's lasso pole. Skipping the side cache drops the Yum-o-meter to 90%, which is just under the Done to a Turn threshold for this stage. The achievement fires reliably on a clean All Good Things run, and the stage is also a strong contributor to the Conquest of the West time attack.
Showdown at High Noon: The Final Stage
Showdown at High Noon is the boss lead-in and the final main stage of the world. It has three main lasagnas and one side cache, and the lasso swing is required for two of the main pickups. The side cache sits on a platform above the boss arena, and grabbing it before the boss fight is the only way to trigger Creme de la Creme on this stage.
The boss arena is locked once you enter, which means the side cache must be collected before the cutscene triggers. Players who rush into the boss fight without grabbing the side cache have to restart the stage, because the cache disappears when the boss spawns.
Side Levels: The Saloon, Ghost Town, and Buried Treasure
The three side levels feed back into the main achievement cascade. The Saloon unlocks the Cowboy costume, Ghost Town triggers the Trick or Treat achievement, and Buried Treasure is the final lasagna cluster in the world.
| Side Level | Lasagnas | Achievement Tied | Lasso Required |
|---|---|---|---|
| The Saloon | 2 | Cowboy costume unlock | No |
| Ghost Town | 3 | Trick or Treat | Yes |
| Buried Treasure | 3 | Feline Harvester total | Yes |
The Saloon is the easiest side level and the only one without a lasso requirement. Ghost Town is the trickiest because the pickups sit on rooftops that are only reachable via a lasso swing from a clocktower pole. Buried Treasure is an underground cache with three pickups that require a lasso swing from hanging chains.
The Yum-o-Meter and the Done to a Turn Threshold
The Yum-o-meter is the core pickup-tracking mechanic, and the Done to a Turn achievement fires when the meter reaches 100% on three or more Barbecue Desert stages. The meter starts at 0% on each stage entry, and each lasagna adds roughly 20% to the meter. Side caches add 10% each, which means a stage with four main pickups and one side cache can hit 90% from main pickups alone and 100% with the side cache included.
The meter also drains over time, and heat tiles accelerate the drain. Tumbleweed Town has no heat tiles, so the meter drain is slow. Higher and Higher has heat tiles on the second and third tiers, which means the lasso-equipped climb order is critical for hitting 100% before the meter drains past the threshold.
Stage Meter Targets for Done to a Turn
| Stage | Main Pickups | Side Cache | Meter at 100% | Heat Tile Penalty |
|---|---|---|---|---|
| Tumbleweed Town | 4 | 1 | Yes | None |
| Dusty Trail | 3 | 1 | Yes | Minor |
| Higher and Higher | 5 | 0 | Yes | Heavy |
| All Aboard! | 4 | 1 | Yes | None |
| All Good Things | 4 | 1 | Yes | Minor |
| Showdown at High Noon | 3 | 1 | Yes | None |
The meter at 100% column marks whether the stage alone can trigger Done to a Turn on a clean run. Against the Tide is excluded from the table because the stage's meter peaks at 85% on a clean run, which means it cannot trigger the achievement on its own. It can contribute to the 3-stage threshold when combined with Tumbleweed Town and Dusty Trail, but the community testing data shows the combination is rare because the time attack routing favors main stages over Against the Tide.
Conquest of the West Time Attack Routing
The Conquest of the West time attack trophy requires clearing all seven main stages in under 25 minutes, and the route is calibrated against the lasso-equipped pickup chain. The community walkthroughs show the time attack route as a single forward sweep with no backtracking, and the stage order is fixed: Tumbleweed Town, Dusty Trail, Higher and Higher, All Aboard!, Against the Tide, All Good Things, Showdown at High Noon.
The time attack window is roughly 20 seconds wide based on community testing, and the optimal route saves 15 seconds on Higher and Higher by using the lasso swing instead of the standard climb. Against the Tide is the bottleneck because the current slows the average pace by roughly 10 seconds compared to a non-water stage, and the optimal route skips the third lasagna to save 5 seconds. The skipped pickup is the third one in the river, which sits in a small eddy that requires a 3-second pause to grab.
Time Attack Stage Splits
| Stage | Optimal Split | Pickups Grabbed | Pickups Skipped |
|---|---|---|---|
| Tumbleweed Town | 2:15 | 5 of 5 | 0 |
| Dusty Trail | 2:45 | 4 of 4 | 0 |
| Higher and Higher | 4:30 | 5 of 5 | 0 |
| All Aboard! | 3:15 | 5 of 5 | 0 |
| Against the Tide | 3:30 | 2 of 3 | 1 |
| All Good Things | 4:00 | 5 of 5 | 0 |
| Showdown at High Noon | 4:45 | 4 of 4 | 0 |
| Total | 25:00 | 30 of 31 | 1 |
The time attack route skips one pickup on Against the Tide because the third lasagna sits in an eddy that costs more time to grab than the time savings allow. The Feline Harvester achievement is not affected by this skip because the threshold allows for one missed pickup per world on a time attack run. Players who want both the time attack trophy and the full pickup total need to run Against the Tide twice: once on the time attack clock, once on a clean pickup sweep.
Frequently Asked Questions
How many lasagnas are in Barbecue Desert total?
There are 32 lasagnas across the seven main stages and three side levels, which breaks down to 26 main pickups and 6 side cache pickups. This total feeds the Feline Harvester achievement and the world-specific Creme de la Creme trophy, and missing any of the side caches drops the Done to a Turn threshold below the trigger condition for at least two stages.
Do I need the Cowboy costume to grab every lasagna?
Yes. The lasso swing is the only movement option that reaches four side caches and roughly 8 main pickups across Higher and Higher, All Aboard!, All Good Things, and Buried Treasure. The costume unlocks by completing The Saloon side level with at least 80% Yum-o-meter, which is the fastest unlock path in the game.
What triggers the Trick or Treat achievement?
The Trick or Treat trophy fires when you fully drain the Ghost Town side cache, which means all three lasagnas on the Ghost Town rooftops. The cache is the only side cache in the world that is fully off the main path, and it requires a lasso swing from the clocktower pole to reach the highest rooftop. Players without the Cowboy costume cannot trigger this achievement.
Can I get Conquest of the West without a perfect pickup run?
Yes. The time attack route allows for one missed pickup on Against the Tide, and the achievement threshold is calibrated against that single skip. Missing any other pickup in any other stage is enough to bust the 25-minute window because the timing buffer is only 20 seconds wide on community testing data.
Where does the Creme de la Creme achievement actually fire?
The Creme de la Creme achievement fires the first time the Yum-o-meter hits 100% on any single stage, and the easiest stage to trigger it on is Dusty Trail because the stage has only 4 pickups total. Higher and Higher also triggers it on a clean run, but the heat tile drain makes the timing tighter than Dusty Trail.