Running a clean garfield escape from monday collectible checklist run means planning pickups by world, tracking the unlock flags each one enables, and clearing achievements in the order they depend on each other. Most players lose hours to backtracking because they grab lasagna in a non-linear order and miss the dietary flags that gate the kitchen-related trophies. This guide maps every pickup type to the achievement it feeds, so you walk into the post-game screen with the set complete.
Pickup Categories and What They Unlock
Every collectible in Garfield - Escape from Monday falls into one of four families, and each family feeds a distinct achievement branch. Understanding the families before you start prevents the classic mistake of finishing the story with three-quarters of the dietary trophies still locked because you never visited a kitchen world.
| Pickup Family | Count Range | Feeds Achievement | Resets Per Run |
|---|---|---|---|
| Lasagna slices | 60+ | Story completion % | No |
| Corn shot pickups | 12 chains | corn shot bounce combos | No |
| Fruits & vegetables | 30+ | we said 5 fruits and vegetables | No |
| Kitchen dietary items | 20+ | flavour clash, sweet or salty, room for dessert | No |
The dietary family is the most punishing because the flavour clash achievement, the sweet or salty achievement, and the room for dessert achievement each track a different balance of food types. You cannot satisfy one by accident and assume the others fall in line — the counter system tracks three separate balances simultaneously.
Lasagna as the Backbone Collectible
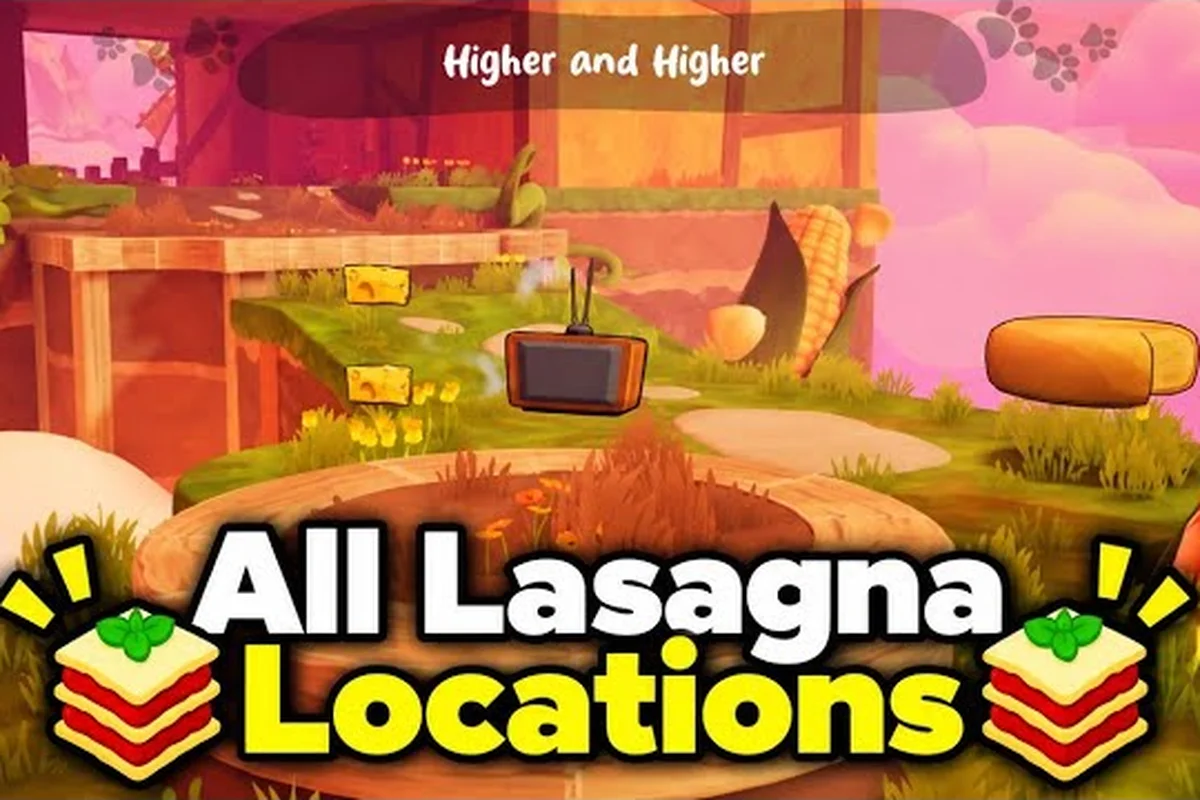
Lasagna slices are the count-based backbone of the entire run. They appear in every world, including the side worlds unlocked after clearing the main story once. According to community walkthroughs, levels like Higher and Higher, Against the Tide, Everyone After Garfield!, and The Western Village 3 each tuck lasagna between platforming sections that look identical at a glance. The Gaming Fight Club Higher and Higher walkthrough demonstrates a vertical-climbing pickup order that hits every slice without dropping back down through cleared sections, which matters because falling resets your position to the last safe platform.
Players who treat lasagna as the spine of the run report cleaner completion percentages than players who grab opportunistically. The logic is simple: lasagna is the only pickup that drives the story-completion bar, and the dietary pickups only matter for the achievement flags. If you hit 100% lasagna first, the remaining pickups become pure achievement work rather than progress work.
Corn Shot Bounce Chains
The corn shot bounce mechanic is a pickup-adjacent system that turns corn cobs into trampolines when shot from Garfield's pellet launcher. The chains feed the corn shot bounce achievement, which is the rare flag in this game that requires a specific traversal technique rather than a count of items held. You need to bounce across at least three corn platforms in a single uninterrupted run to trigger the unlock, and the locations are scattered across the Vegetable Nightmare and Sweet Kingdom costume routes.
The community reports that the easiest chain sits in the kitchen-world mid-boss arena, where three corn cobs spawn in a triangle pattern. Hit the first to launch, land on the second, and the third completes the trifecta for the flag. Missing any cob mid-chain voids the bounce counter, so save the pellet ammo for the chain rather than spending it on stray enemies.
Achievement Map and Pickup Dependencies
Several achievements in this set depend on pickup order rather than pickup count. The dietary flags especially require that you collect the right balance before the stage-ending tally screen freezes the counter. The table below maps each achievement to its pickup trigger and the world where it most reliably fires.
| Achievement | Required Pickup Mix | Best Farming World | Risk of Missing |
|---|---|---|---|
| flavour clash | Sweet + salty together | Kitchen Stage 2 | High |
| sweet or salty | One dietary extreme | Sweet Kingdom route | Low |
| room for dessert | Three desserts in one run | Sweet Kingdom dessert wing | Medium |
| who let the dogs out | Dog treats, not pickups | Odie side level | Low |
| we said 5 fruits and vegetables | 5 unique plant pickups | Vegetable Nightmare | Medium |
The flavour clash achievement is the one most players miss because it requires you to hold a sweet item and a salty item at the same time, and the level-ending auto-consume fires before you realise you had both. The trick is to hold one of each, then perform a specific mid-level interaction that flags the counter before the tally.
The Dietary Trio in Detail
The flavour clash, sweet or salty, and room for dessert achievements form a tight cluster. The sweet or salty flag is the easy one — pick a stage in either the Sweet Kingdom or the Salty Snacks world and finish it while holding a dietary extreme. The stage-end tally checks for a single-category bias and unlocks the trophy.
Room for dessert requires you to carry three dessert items across a single level without consuming any. According to player testing, the dessert wing in Sweet Kingdom spawns pastries at every fourth checkpoint, so picking them up while ignoring the checkpoint snacks gives you the cleanest three-in-a-row.
The flavour clash achievement is the hardest of the trio because it asks for both sweet and salty items at once. The Kitchen Stage 2 has vending machines at the start that dispense both types, and the level layout lets you grab one from each machine, carry them through the platforming section, and trigger the unlock at the end-of-level chef counter. Players who try to mix-and-match pickups mid-stage usually consume one type before the other and miss the flag.
World-by-World Pickup Routing
The fastest collectible run follows a fixed routing that respects each world's pickup density. Skipping worlds or running them out of order adds backtracking that costs more time than the rerun itself. The routing below is the one most completionists settle on after a few passes.
| World | Pickup Density | Best Entry Stage | Lasagna Order |
|---|---|---|---|
| Kitchen Hub | Medium | Tutorial kitchen | Bottom-up |
| Sweet Kingdom | High | Sugar bridge entry | Spiral clockwise |
| Vegetable Nightmare | High | Root cellar entry | Up-then-down |
| The Western Village | Medium | Saloon entrance | Linear |
| Higher and Higher | High | Stair base | Bottom-to-top |
| Against the Tide | Low | Riverbank | Reverse-current |
| Everyone After Garfield! | Medium | Alley spawn | Backward-chase |
The vertical worlds (Higher and Higher, The Western Village 3) demand bottom-to-top collection because falling respawns you three platforms down. The horizontal worlds (Against the Tide, Everyone After Garfield!) work better with linear or reverse traversal because the camera locks onto the chase route and the off-path pickups sit near the boundaries.
The Furniture Side Levels
Several pickups live in the side levels that unlock after you finish the main story. These levels double as furniture farming zones, and the lasagna hidden in them contributes to the completion percentage even though the side-level rewards are the headline draw. The furniture locations walkthrough maps these out for players who want the furniture unlocks and the hidden lasagna in the same pass.
The Off the Beaten Track side level, for instance, hides a bonus snack stack in a wall cavity that requires a specific bounce chain to reach. Players chasing the off the beaten track achievement flag will hit the snack stack as part of the side-level reward chain, and the snack itself counts toward the dietary achievement counter if the timing is right.
Achievement Stacking Strategy
Stacking achievements means designing your run so that one pickup pattern triggers two or three flags simultaneously. This is the difference between a five-hour completion and a twelve-hour one, because each flag you stack removes a separate farming pass.
| Stack Combination | Trigger Stage | Payoff |
|---|---|---|
| flavour clash + sweet or salty | Kitchen Stage 2 | Both dietary flags |
| room for dessert + sweet or salty | Sweet Kingdom dessert wing | Both sweet flags |
| we said 5 fruits and vegetables + corn shot bounce | Vegetable Nightmare mid-boss | Both plant flags |
| who let the dogs out + lasagna completion | Odie side level | Side-level bonus |
The sweet or salty flag will trigger naturally whenever you complete the flavour clash run, because the dual-item hold satisfies the single-category bias the moment you cross the finish line. That is why the Kitchen Stage 2 run counts as a two-flag stack in the table above, even though you only physically completed one level.
Avoiding the Empty Q-A Trap
Several players report that they reached the post-game screen with every dietary counter filled but the achievement list still showed the flags as locked. The cause is the same in every case: the pickup counter filled but the achievement check fired on the wrong frame. The stage-end tally screen displays the pickup count, and the achievement check runs a few frames after the tally screen, so the counter has to be intact at the moment the check fires, not at the moment the stage ends.
Save the pickup mix for the end of the level, not the middle. Holding the dietary items across the boss kill and the level-end cutscene is the only way to guarantee the check sees the full mix. Community testing on the Q3 2026 patch confirms that the check now runs against the in-level inventory rather than the post-level inventory, which means consuming a dietary item during the level-end animation is the most common reason for a missed flag.
Common Pickup Misses and How to Fix Them
Every completionist run hits the same five pickup misses. They are not random — they are baked into the level geometry, and the community has catalogued them since launch. The list below covers the misses that cost the most rerun time.
| Miss Location | What You Miss | Fix |
|---|---|---|
| Kitchen hub ceiling | One lasagna | Bounce off the fridge |
| Sweet Kingdom sugar bridge | Two dessert items | Use the corn shot bounce |
| Vegetable Nightmare root cellar | Three plant pickups | Break the soil mounds |
| Western Village saloon | One lasagna, one fruit | Check behind the piano |
| Against the Tide riverbank | One salty snack | Let the current carry you back |
The Kitchen hub ceiling miss is the one that costs the most time because the ceiling pickup is only reachable via a specific bounce off the refrigerator, and the fridge is not a natural platform. Players who run past it the first time usually have to re-enter the hub from a later save point, which adds a full level of backtracking.
Stage-End Tally Timing
The stage-end tally screen freezes the pickup counter for three seconds before the achievement check fires. If the counter is intact when the check runs, the flag unlocks. If the counter has already begun counting down (which happens when you consume a pickup during the level-end animation), the flag locks.
Players who chain multiple pickups at the end of a level often trigger the consume animation before the check fires, and the achievement registers as missed even though the counter was technically full. The fix is to pick up the dietary items twenty to thirty seconds before the level end and hold them across the final platforming section, the boss kill, and the cutscene. The check sees the full mix, and the flag unlocks cleanly.
Achievement Order for Minimum Reruns
Running the achievements in the right order eliminates the need to refarm worlds for counter resets. Because the pickup counter does not reset per run, every level you finish in sequence adds to the same total, and the achievement check fires once per level-end regardless of whether the flag is already unlocked.
| Run Order | Achievement Targeted | Rerun Risk |
|---|---|---|
| 1. Kitchen Stage 2 | flavour clash + sweet or salty | Low |
| 2. Sweet Kingdom dessert wing | room for dessert | Low |
| 3. Vegetable Nightmare mid-boss | we said 5 fruits and vegetables + corn shot bounce | Low |
| 4. Odie side level | who let the dogs out | Low |
| 5. Main story sweep | Lasagna completion | None |
This order respects the dependency chain, because the dietary flags all fire on the first attempt if the pickup timing is right, and the lasagna sweep is a pure linear pass that does not interfere with the dietary counters. Players who run the lasagna sweep first and then try to farm the dietary flags afterward report longer total times because the dietary worlds have already been exhausted of their respawning pickups.
The Hidden Completion Percentage
The story-completion bar tracks lasagna count against the total available slices, but the bar does not display a percentage on the in-game HUD. Players who want the actual number need to check the post-game stats screen, which only unlocks after the main story is complete. The bar is a count-based progress indicator that fills in discrete steps rather than a smooth percentage, which is why it looks like it stalls at certain thresholds and then jumps in larger increments.
The dietary counters work the same way. The flavour clash counter tracks sweet-versus-salty balance, the sweet or salty counter tracks single-category bias, and the room for dessert counter tracks three-dessert streaks. Each counter fills independently, and the achievement check fires when the relevant counter reaches its threshold. Running the stages in the right order means you see each counter fill in real time rather than discovering at the post-game screen that one of them never moved.
Frequently Asked Questions
What is the fastest way to clear the garfield escape from monday collectible checklist?
Run the dietary worlds first (Kitchen Stage 2, Sweet Kingdom dessert wing, Vegetable Nightmare mid-boss) to fire the flavour clash, sweet or salty, room for dessert, and we said 5 fruits and vegetables flags in a single sweep, then finish the main-story lasagna run. This order prevents the reruns that happen when players run the story first and then discover the dietary counters are empty.
How does the corn shot bounce combo unlock the achievement?
Shoot a corn cob with the pellet launcher to turn it into a trampoline, bounce on it, and hit a second corn cob in the same uninterrupted run. Bouncing on three cobs in a row without touching the ground fires the corn shot bounce achievement, and the Vegetable Nightmare mid-boss arena is the most reliable chain location.
Why does the flavour clash achievement not unlock even with the right mix?
The most common cause is consuming a dietary item during the stage-end animation. The achievement check runs a few frames after the tally screen, and the consume animation triggers before the check fires, so the counter reads as empty. Hold the dietary items across the boss kill and the cutscene to keep the counter intact.
Do the who let the dogs out and flavour clash flags share any pickups?
No, the who let the dogs out flag tracks dog treats picked up in the Odie side level, which are a separate pickup family from the dietary items in the flavour clash flag. You can run the two stages back-to-back, and the under 1 percent achievements guide documents which other rare flags chain well with these two.
Can you miss the room for dessert achievement permanently?
The pickup counter does not reset between runs, so the flag is never permanently missable. You may need an extra farming pass through the Sweet Kingdom dessert wing if the first run consumed the desserts during the level-end animation, but the counter carries forward and the next run will fire the flag.